Create a new, empty, collection database from a template, using a wizard
A new collection can be created from one of a set of templates that Recollector provides. Each template gives you an initial set of data fields that are appropriate for the particular kind of collectible. A wizard steps you through the process of creating your new collection. In addition to selecting a template, the wizard lets you name your new collection, add to, modify, or delete fields provided by the template, select default units for currency and dimension fields, and choose where on your disk your collection file will be stored.
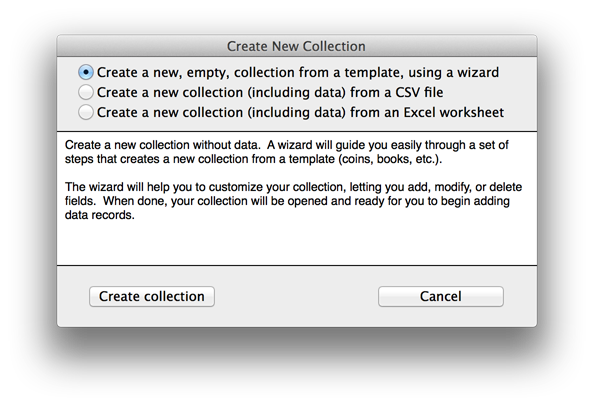
To make a collection from a template, use Recollector's menu and choose File > New Collection. In the Create New Collection window that comes up, select Create a new, empty, collection from a template, using a wizard, and click the Create collection button.
| View the Create New Collection dialog ... |
The wizard begins with an overview, listing the steps that you will take to create your collection. Click Next to move to the first step of the wizard. While in the wizard, you can click Back to move backwards if you want to revisit an earlier step to make changes. You can also click the Step tabs at the top if you want to jump over steps. It is best to visit all the steps, but if you skip over a step, Recollector will supply default values for the choices in the skipped step.
| View Step 1: Name your collection ... |

Type in a name for your new collection. As shown in the wizard window, your collection name can consist of a single word or multiple words. You can use letters, numbers, underscores and spaces in the name, but do not use any other characters. After entering a name, click Next.
| View Step 2: Choose a template ... |

Recollector provides a number of templates, each of which provides a reasonable set of starting fields for a particular kind of collection. Choose a template from the dropdown list. (As you select a template from the list, a description of the template is shown, so you can try different templates to locate the one that seems, on the basis of the description, to be the most appropriate one for your collection.
If none of the templates seems appropriate, choose the generic template. This is a simple template that contains fields that are appropriate for nearly any kind of collection. In the next step of the wizard you will be able to add additional fields appropriate to your particular collection.
Click Next to move forward, to customize your set of fields.
| View Step 3: Customize the fields ... |

The fields provided by the template are shown in the list at the lower left. If you want to change a field's name, select the field in the list and then enter the new name into the 'Field name' text-entry box, and click Change. If you want to change a field's data-type, select the field from the list and select the new data-type from the drop-down list.
| View information on Recollector's data types ... |
To delete a field, select the field in the list and click the Delete field button.
To add a new field to the list, click the Add a new field button. A panel will be displayed that lets you enter a new field's name and type. New fields are added at the bottom of the list. However the order of fields in the list does not really matter. Once you are using your collection, Recollector provides menu choices that let you fully control the order in which fields are displayed. The order shown in the list in this step of the wizard is not important.
When you have finished customizing the set of fields in your collection, click Next to move to the next step.
| View Step 4: Choose default units ... |

Your collection probably has one or more currency or dimension fields. When Recollector displays these fields, it shows the values along with the units in which the value is measured. In this step of the wizard select the currency units and the dimension units that you want to use. If, for example, you have a currency field called Price, and you use dollars to track prices, then you should select '$' as the default currency units.
Because you have provided default units, you will not need to enter a currency symbol or a dimension units label when you are entering data for your collection. You can enter a price as 100, not as $100. Recollector will automatically display the dollar sign so that when you are viewing your collection you know what currency or dimension units are being used.
Sometimes you will have a currency or dimension field for which you cannot use the default units. This may happen if you have a single field for which you want to use units other than the default. For example you may have a number of dimension fields, most of which use centimeters as their units, but you have one field for which you want to use millimeters. You can do this by including the units value, within parentheses, at the end of the field name. So, for the example given here, click the Back button to return to the previous step of the wizard, and select and rename the desired field so that its measurement units are shown, in parentheses, at the end of the name. For example, you might rename a field that had been named Thickness and change its name to Thickness (mm.).
In other instances you might want to use a currency or dimension unit that isn't provided as one of the defaults. For example, your collection's currency fields might be denominated in Yen, but Yen isn't provided as one of the default choices. As with the example given in the previous paragraph, you can go back to the previous step of the wizard and rename the currency field, so that the desired currency units or symbol is given as the last part of the field name, in parentheses. So you might change a field that had been named Price to Price (¥).
When you have selected default currency and dimension units, click Next to move to the last step of the wizard.
| View Step 5: Choose your collection file location ... |

In the last step of the wizard, you select where you want to store your collection file. All Recollector collections are stored as a single file on your disk. The files are stored in XML format, which means that the file name for your collection file must have an extension of .xml. The wizard will suggest a file name for your new collection file, based on the name you gave to your collection in the first step. It will also suggest that you store the file in your Documents folder. But Recollector allows you to store your collection file anywhere you want, and to name it anything you want (as long as it has an extension of .xml), so to change either the name or location, click the Browse button and select the desired name and location of your collection file.
Click Finish to complete the creation of your collection. The new collection will be opened in a collection window, and a completion notice will be displayed.
| View New Collection ... |

As the completion notice shows, you can now begin to add data records to your collection, by choosing Add New Record(s) from the File menu. See Adding Data for more information.
You can make changes, at any time, to the choices you made in the wizard when setting up your collection. To change the collection's name, its fields, or its default currency or dimension units, choose Modify Fields or Image Directory from the Edit menu. For more information on how to make changes see the Modify fields section of the Help pages.
Recollector also created a folder for holding the image files for your collection. This folder is referred to as the Image Directory. The Image Directory was created as a sub-folder in the same folder where you chose to store your collection file (in your Documents folder, by default). The name of this folder is identified in the completion notice. See help on the Image Directory for more information about using images with your collection.