Searching
Search through your collection to locate a record that contains a particular data value. To search, select Search > Find from Recollector's menu. A search panel is displayed and you can enter the value you want to locate.
The List tab and the Image Gallery tab, on the one hand, and the Item Details tab, on the other, show slightly different versions of the search panel.
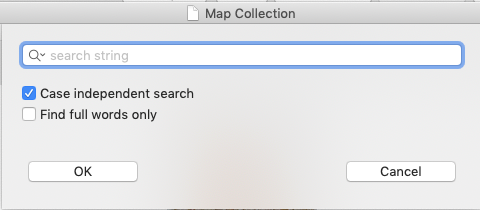
For the List tab and Image Gallery tab, the search panel lets you enter a search value and select which field, if any, to search in. Choose "Any field" to search in all data fields:

If you select a field to search in whose type is short text or one-line text, then you can type a few characters into the search string field and then click the match button. This will find existing values in the selected field that begin with the characters you typed in. If only one matching value is found, it will be inserted into the search field. If there is more than one matching value, a popup list of matches will be displayed, from which you can choose. The chosen value will be copied into the search field.
You can choose whether the search should be done in a case-independent fashion. You can also choose whether only full-word matches will be found. If full-word matches are not requested, then a match will be found even if the search string is just part of a larger word. If the search string contains any non-ASCII characters (for example, accented characters), then searching pays attention to accent marks (diacritics), so searching for différent will match différent but will not match different, because of the accented é character in the search string. On the other hand, if the search string contains only ASCII characters, then searching will ignore accents and other diacritic marks. So, searching for different will match both different and différent.
In the List tab or Image Gallery tab, you have two options for searching:
- Search for next matching record - this option will search forward, from the currently selected record, looking for the next record that meets the search criteria. That record will then become the selected record. The search will wrap back to the top if the last row is reached.
- Create a temporary 'search subset' with just the matching records - this option will find all the records that meet the search criteria and the set of items shown will be reduced to just those matching items. A note, in the lower right-hard corner of the window, will remind you when a search subset is in effect. Recollector also has a separate, more elaborate and capable subsetting capability, which is described in the section of the User's Guide about Subsetting. The 'search subset' capability is a somewhat quick-and-easy way to perform subsetting temporarily. The chapter on Subsetting describes both kinds of subsetting.
With either kind of searching, an alert will be shown if no record is found that contains the search string.
If you choose the Search for next matching record option from the List tab or Image Gallery tab, and then immediately switch to the Item Details tab, the matching strings in the selected record will be highlighted with a yellow background.
View the Item Details tab immediately following a List tab or Image Gallery tab search for the word Atlas ... |

For the Item Details tab, the search panel lets you specify a search string, whether or not the search is to be done in a case-independent fashion, and whether only full-word matches are to be found:
If the search finds any matches to the specified search string, the matches are highlighted with a yellow background. An alert will be shown if the specified search string is not found.
In addition to using Find from the Search menu, each of the three views (List View, Image Gallery and Item Details) has a quick-search text entry box near the top of the page, just below the Previous and Next buttons. You can type a string to search for into the quick-search text entry box, and then either press the <Return> key or click on the magnifying-glass icon at the left of the quick-search text box. This will perform a search without bringing up the Find panel. When searching using the quick-search text box, the search will be performed case-independently, and full-word matching will not be used. The quick-search text box is really just a short-cut equivalent to bringing up the Find panel, entering the search text, choosing to search in Any field, turning off the two check boxes (Match Upper/Lower Case and Find Full Words Only), and choosing Search for next matching record. Searching begins in the record following the currently selected one (or wrapping around to the first record if the currently selected record is the last record). On the Item Details tab, searching using the quick-search text box does not search from one match to the next; rather, all the matching texts within the record are highlighted at once, with a yellow background.
Searching in the data-editing (and data-entry) window:
You can also search in the data-editing/entry window. The search will look for the next occurrence of the specified search string, and the matching text will be highlighted. The edit window and the text-edit box (where the match was found) will be scrolled, if necessary, to make the matching text visible.
Notes on searching:
- Searching is text-based, even for non-text fields. Therefore, searching for "3/22/45" will not match a date field value of "March 22, 1945".
- Search is diacritic insensitive. Searching for "aout" will find "août".
- After performing a search in the List tab or Image Gallery tab and then switching to the Item Details tab to see the highlighted matches, you can switch back to the List tab (Options > View Collection List or keyboard shortcut: ⌘L) or to the Image Gallery tab (Options > View Collection List or keyboard shortcut: ⌘I) and continue searching for the next matching record by choosing Search > Find Again (keyboard shortcut: ⌥⌘A).
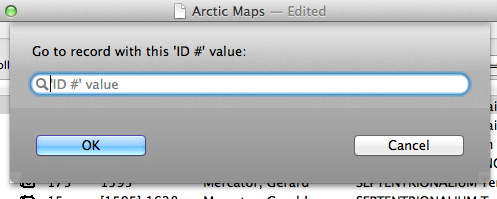
Searching for a record by its ID # value:
The Search menu has a special choice, Go to ID #. This menu choice lets you jump to a particular record, identified by its ID # value, whether you are in the List tab, the Image Gallery tab, or in the Item Details tab:
Go to ID # is not available in the data-editing or data-entry windows.
Find and Replace
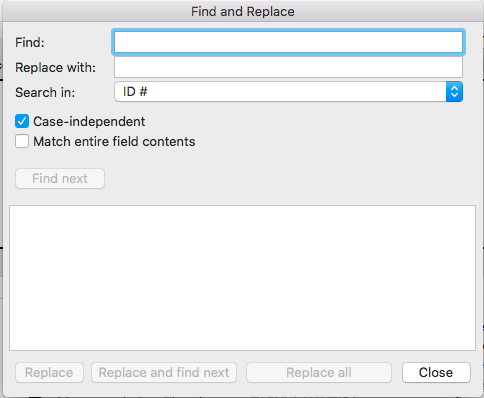
When on the List tab, you can use the Find and Replace dialog to find and make changes across multiple records. (Find and Replace is not available from the Image Gallery tab or the Item Details tab.)
Enter the text you want to search for, and the text you want to replace it with. Select the field in which you want to do the find/replace operation. If you want to replace values just in those records for which the field is empty, leave the Find field blank and just specify the Replace with value.(You can only make changes to one field at a time. If you want to make changes in more than one field, make the changes to the first field, then change the Search in choice, and proceed to make changes to the next field.)
If you turn on the Case-independent checkbox, the program will find matching text regardless of lower/upper-case. So a search for "France" will match "France", "france", "FRANCE", etc. When you do the replace, however, the found text will be replaced by the exact text you entered into the Replace with text box; no changing of case will occur.
If you turn on the Match entire field contents checkbox, then a match will only be found when the Find text matches the full contents of the selected field in a given record; partial matches will be ignored.
The program will not match text that spans more than one style. So, for example, if you had the text "untested" (with the first two letters in bold-italic style), searching for "untested" would not match this text.
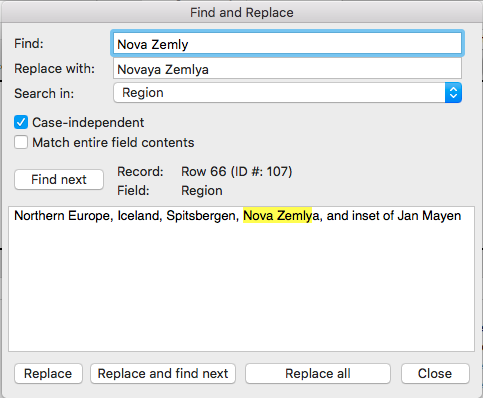
After filling in the various find/replace choices, click the Find next button:
The program will search through the records (starting at the currently selected record), looking for a match. When one is found, it will be displayed, as shown in the example above, with the matching text highlighted, and the record and field identified. (If no match is found, a message indicating this will be shown.)
At this point you can perform a replace. Click Replace to replace the one instance just found. Click Replace and find next replace the one instance and then search for the next matching instance (which might be in the same record, or might be in another record). Click Replace all to replace all occurrences. Since Replace all might modify many records in your collection, you will be prompted whether you really want to proceed with this operation. When the Replace all operation completes, the program will report how many replacements were made.
Find and Replace only works on the records currently in the List View. If you have a subset in effect, only the records in the subset will be subject to modification.
If you are replacing values in a field that is part of the List View's current sort order, the List View will immediately reflect the changes made by replacement, but will not reflect the possibly changed sort order until you close the Find and Replace dialog.