Recollector User’s Guide
Creating and Using Field Profiles
The List View of the collection window can display some or all your collection’s data fields. At times, you may want the List View to show columns for all the fields in your collection. At other times, you may want to only display a subset of the fields. You can change the displayed set of fields (and their display order) via the Field Selection dialog (accessed via the List: Field Selection choice on the Options menu). But, in addition, you can save this information (a chosen set of fields, and their order) as a “field profile”. Once you have created a field profile, you can use the Set Field Selection from Profile (on the Options menu), to quickly set the List View’s display to match what is specified by the profile. You can create multiple profiles for a collection; the profiles are saved as part of the collection.
Field profiles are also useful in conjunction with printing and exporting data. Printing from the List View and exporting data (either to Excel or to an ASCII file) both produce output that matches the List View: Only the fields that are shown in the List View are printed/exported, and their order in the output matches the order in the List View. As an example, suppose you would like to periodically export data from your collection to Excel, just to do some spreadsheet computation on the price information in your collection database. You could create a field profile that specifies just one field: Price. Whenever you want to run your price computations, just use Set Field Selection from Profile to switch the content of the List View to match what is specified by this profile. Then run Export to Excel. You could then switch the List View back to a fuller display by selecting a different profile. For example, you might have created a profile named “Standard view” that includes all the fields that you normally want to display in the List View.
To create a field profile, select Manage Field Profiles on the Options menu. The following dialog box will be displayed:
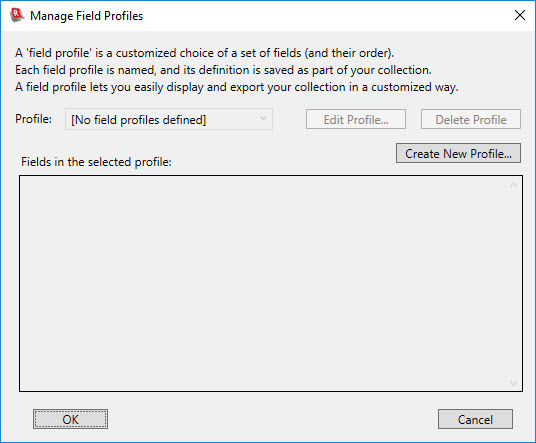
This picture shows what the dialog box looks like when you don’t yet have any profiles defined for your collection. If you have one or more profiles defined, the dialog will start out with one of your profiles selected, as in the following example:
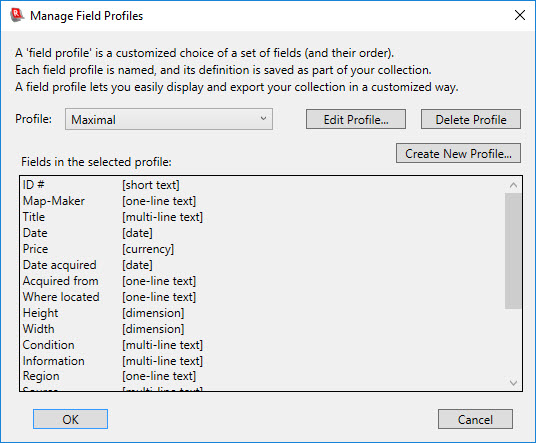
Use the drop-down list to switch to see other profiles that you have defined; selecting any profile causes the fields contained in that profile to be displayed in the larger area in the middle of the dialog box.
To create a new profile, click the Create New Profile button. This brings up the following dialog box:
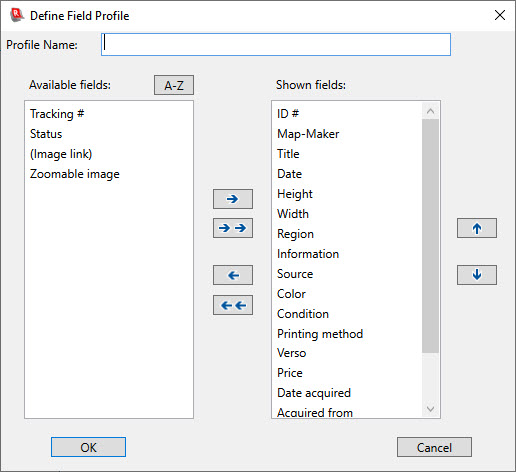
Enter a new name for the profile you are creating. Then use the various arrow buttons to select which fields will be included in the profile (the “Shown fields”), or to modify the order of the fields in that list. You can also use drag-and-drop to move entries from one list to the other, or to rearrange the order of entries in a list. The dialog initially displays the choices based on the fields currently being displayed in the List View. If the Available fields list contains many field names, you may find it easier to locate a particular field by ordering that list alphabetically: Click on the A-Z button to order the list alphabetically.
In the Manage Field Profiles dialog there are also buttons that allow you to edit or delete an existing profile. If you choose to edit a profile, the same dialog box that is used for creating a new profile will be shown, but the values it shows will reflect the profile you have asked to edit. If you ask to delete a profile, the program will prompt you to confirm the deletion.
Once you have created one or more profiles, you can request that the List View be changed to match a particular profile. You do this via Set Field Selection from Profile on the Options menu. Selecting this menu item will bring up a sub-menu that lists all the field profiles that you have defined. Select the one you want, and the List View will switch to match the selected profile.
When you generate a printed report or a web site, the wizards include a step that lets you select the fields to include. One of the ways the wizard allows you to do this is to select fields based on a field profile, and a drop-down list of all the collection’s field profiles is provided for doing this.
Reserved field profile names
There are several reserved names for field profiles that function in a special way. These are described here. Note that if you create a field profile with one of these reserved names, be sure to name the field profile exactly as shown here (including matching upper/lower-case spelling).
• Image Gallery - If you have a field profile whose name is Image Gallery, then the program will use the fields (up to six) defined in the profile as the fields whose values are displayed in the individual cells of the Image Gallery view. If there is no field profile defined with this name, the program will use the first three fields of the List View as the fields to display in the Image Gallery view. The Image Gallery field profile provides a way for you to have the Image Gallery display a different set of fields than what is shown in the List View. (Though the program will use up to six fields from the Image Gallery profile, the profile can have fewer or more fields. If it has fewer than six, only as many fields as are defined in the profile will be shown in the Image Gallery view. If it has more, only the first six fields will be used.)
• Item Detail Groups – Normally the Item Details view displays all fields with equal vertical spacing. If you to prefer to group certain fields together, and offset them from adjacent fields, by including more blank vertical space between the groups, you can do this using the Item Detail Groups field profile. Add to this field profile any field that you want to consider as the first field in a group. Additional vertical space will be added in the Item Details display prior to this field. The order of field names in this profile does not matter; it is simply the presence of a field name that causes that field to be treated as the beginning of a group, with additional vertical space displayed above this field in the Item Details display. The Item Details view only shows fields which have data; empty fields are not displayed. However, if you specify a field in the Item Detail Groups field profile, and that field is empty for a particular data record, the extra spacing that would normally precede the display of that field is not lost; it will instead precede the next non-empty field.
• Subset: <subset name> – Subsets can make use of specially named field profiles. If you create a field profile whose name is Subset: subset name (where subset name is the name of the associated subset), then Recollector will automatically switch to using that field profile in the List View when you switch to the subset. So, for example, if you created a subset named large marbles, then if there is a field profile named Subset: large marbles, that profile will be immediately applied to the List View when you switch to the large marbles subset. For these subset-profile names, matching is case-independent, including for the initial word (“Subset”). And, for readability, you can optionally include a space after the colon. So, for example, a field profile named SUBSET:Large Marbles would also be recognized as a match for the large marbles subset.)
• Subset: none – If you define a field profile whose name is Subset: none then that profile will be applied automatically to the List View when you switch from a subset to no subsetting (by choosing Show Full Collection (no subsetting) from the Subset menu), or when the collection is initially opened. It is recommended that if you do define field profiles for one or more of your subsets, you also define a Subset: none profile. That way, the next time the collection is opened (which always results in the List View being displayed, with no subsetting), the List View will not inadvertently display just the fields from a subset profile, if a subset (and its associated profile) happened to have been in effect when you previously closed the collection or exited from Recollector.
Note: If you have multiple collections, the profiles you create are each specific to just one collection: the collection that was active when the profile was created. This is because different collections can define different sets of fields, and there is no guarantee that a profile created for one collection will work appropriately with a different collection.
Back to: Recollector - Home Page